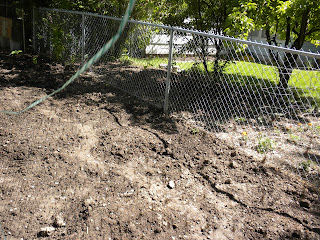
So I spent around six hours last Saturday working on the gardens. I've planted:
- pumpkins
- scallop squash
- three types of cucumber
- peas
- tigger melon (yes, that is Tigger as in Winnie the Pooh)
- carrots
- zucchini
We've still got to put peppers, eggplant, lettuce and tomatoes in the ground. Oh, beans too. I'll do most of that tomorrow.
As I worked, it quickly became clear that the chickens were going to destroy my planting beds and tear up any seedlings. I had to come up with a way to keep them totally out of the gardens. I think what I worked up will function well and is not too terribly ugly. Here:
I put up some tall poles on the edge of the garden. These are left over from the portable carport we used to have that got torn to bits in one of Utah's windstorms. I also lined the entire garden plot with plastic wicker fences that are about eight inches tall at their tallest. I anchored the poles to the fence in several spots. Then I stretched a bunch of bird netting between the poles, tying it off tightly and using garden staples to get the netting close to the ground. From fifteen feet away, our garden looks like what you see above. Here's a corner:
You can sort of make out the netting. I wove some of my heavy duty twine through the top of the netting and tied it off tightly in order to keep the netting from sagging too much. You can also sort of see the planting beds. This is where the cucumbers, squash and zucchini are planted. Should see sprouts in another week.
Here's the other end of the garden:
You should be able to see some mesh, as well as the pumpkin plants. The sun is about 1/2 hour from hitting those pumpkins full on.
The chickens seem to be able to make out the mesh easily; they haven't even tried to go into the garden since I put it up. Here they are-- earning their keep. We haven't had a problem with pill bugs or earwigs since the chickens began spending their days roaming the back yard.
Since Annemarie can't stand earwigs and pill bugs are a bit of a nuisance, I'm accepting this pest elimination by the chickens as a rent payment along with their eggs.
We were also having a problem with the chickens spreading the compost hither and yon. Here's what I did to fix that:
That's just a piece of plywood that I had sitting around. It took me less than five minutes to get this door up. No hinges, just a stake pinning the plywood against the compost frame:
So it's easy to move because it's lightweight and isn't attached. The stake is far enough in the ground that I'm not going to trip on it:
Look at that luscious compost!
Now, one of the issues that needed to be dealt with was how I could protect the garden and still allow access to we homo sapiens. Easily done. I stuck another pole in the ground. I stretched the netting around the corner pole and tied it off to the new pole. Then I made a barrier from the fence to a point a few feet away from the pole. Now we just use a large piece of wood to fill the gap when we want to keep things closed and just move the wood to get in.
It's working well!
Last, I wanted to share an image of my front yard and flower garden.
Our phlox- the pink/purple stuff off to the right-- is just about finishing its blooming cycle. We have four salvia plants, this corner one is blooming like crazy and the other two in the front are getting going as well. There is a huge salvia in the middle of the phlox, but it usually goes later in the season. Salvia is the tall purple flower right in the corner.
We are eating strawberries, harvest chives and parsley, enjoying the yellow/red of the stonecrop, and are stunned at the size of the daisy patch.
The grass, yes, is lovely. I mow every week so I can mulch without a problem. I water for a long stretch about twice a week. Also, it's hard to see them, but we have some nice irises that are gearing up to bloom in front of the house.
So that's the update. We are a little late with the garden this year, but we have high hopes of catching up in the next three weeks.
Incidentally, we have about 25 tomato plants. I'm selling 14 of them, $5 a piece. They are all heirloom. I have a sign out front (it's behind the big salvia). This is a nice way to make a little bit of packet cash
Next time I'll post a clip of how my three-tiered compost works. I'll also discuss strategies for keeping slugs our and getting rid of them and snails when they show up.


