Howdy. I noticed at least three typos in the previous post.
Please forgive me for my bad grammaring.
You probably noticed that I haven't posted for a couple of weeks. That is because I have been inundated with work to finish my MA project, write-up and defense. I also started my new, full-time job.
So things have been a bit busy.
In any case, Tuesday's tip is in regards to slugs. I intend to post on Friday regarding the compost system and it is then that I will provide pictures of the garden so far.
Slugs and snails are a major nuisance. We have used eggshells in the past, and they have worked somewhat. To use eggshells to deter slugs, you just save a bunch of them and let them get dried out. Then you crush them and sprinkle a barrier around each plant or planting bed. It can be about 1/4 inch wide. Slugs will get sliced to ribbons on them, so that works pretty well.
The problem is that worms would come up from the ground at night and mess up the eggshell barriers. Also, the snails around here are massive, and they just plow through the barriers. So the eggshells were only semi-effective.
I admit that I used slug bait once. I feel bad, but it worked really well. You can just buy bags of it at your local nursery or home and garden store.
We also tried cups of beer, sunk in the ground. The idea is that the beer was very attractive to slugs and snails and they would find the stuff and then drown in the cups. This worked fine, but dirt filled the cups pretty fast.
So what works? Two things: chickens and timing the watering. Oh, make it three things: kids also.
Our chickens get let out pretty early in the day. They spend most or all of the day wandering the yard. They eat bugs like made and they love slugs and snails. There are far fewer of these slimy critters these days. Also, we only water in the morning. This lets the ground dry out during the day so that when evening falls, which is when the slugs and snails love to come out, the ground in the garden is dry. This seems to be deterring them also.
Finally, send kids out to roam the garden patches in the morning. Their mission: hunt down and slaughter all snails and slugs. Sometimes they toss the evil slimers to the chickens and the chickens do the wet work.
Totally organic. Totally effective. Totally freaking cool.
Finally, we dropped the price of the surplus tomato plants to $2 and they went like hotcakes. We sold all of them in about two weeks.
That's all for today. Back Friday for some compost and pictures.
Don't hog this blog! Share with your friends.
Showing posts with label tomatoes. Show all posts
Showing posts with label tomatoes. Show all posts
Tuesday, June 15, 2010
Tuesday, May 25, 2010
A quick guide to transplanting tomato seedlings
Alright.
Yes, it's been a while. Exhaustion had its way with me, but I'm fighting back! I thought I could probably just post a bunch of videos and photos of when I transplanted my tomato seedlings.
Now, I did this about one and a half weeks ago, or on May 15. That is about two weeks later than I usually would do this- but what can I say? Life is sometimes complicated.
In a normal year, my tomato plants would actually be in the ground already. This year, I was lamenting the fact that they weren't until yesterday. You know what happened yesterday, right? Northern Utah was plastered with tons of snow. Yes, on May 24, we had snow here.
So I was glad my tomato plants were not in the ground. They should be in the ground in about another week or two. That will be fine.
Anyway, I really like to keep costs down, so here's what I do for planting pots:
Once the pots are ready, you want to get a layer of dirt in there and pack it well, mainly so that the dirt doesn't just spill out the holes you just cut. Since I tend to have a lot of seedlings, I do this as an assembly line in order to be efficient.
Here's the simple process:
Next, you want to just start planting:
When everything is transplanted and placed back on the windowsill (or shelf, depending on where you are setting these), water them well. What does 'well' mean? You can water them so water comes out the bottom.
Then don't water them for a week-- or at least as long as it takes for the dirt to look quite dry. I've said this countless times, but I am happy to say it again: This wakes up your seedlings' roots.
Okay, so here are my tomatoes, all transplanted and arranged on May 15 (about 10 days ago):

And here they are today:

Not bad, eh?
Anyway, here is probably a good place to announce a revision to this blog's approach. Instead of trying what seems to be impossible at this point: a post every day, I will post stuff here on at least Tuesday and Friday.
See you Friday! I will share with you some of the things I've put in the ground and how I have protected our planting patches from our chickens.
Yes, it's been a while. Exhaustion had its way with me, but I'm fighting back! I thought I could probably just post a bunch of videos and photos of when I transplanted my tomato seedlings.
Now, I did this about one and a half weeks ago, or on May 15. That is about two weeks later than I usually would do this- but what can I say? Life is sometimes complicated.
In a normal year, my tomato plants would actually be in the ground already. This year, I was lamenting the fact that they weren't until yesterday. You know what happened yesterday, right? Northern Utah was plastered with tons of snow. Yes, on May 24, we had snow here.
So I was glad my tomato plants were not in the ground. They should be in the ground in about another week or two. That will be fine.
Anyway, I really like to keep costs down, so here's what I do for planting pots:
Once the pots are ready, you want to get a layer of dirt in there and pack it well, mainly so that the dirt doesn't just spill out the holes you just cut. Since I tend to have a lot of seedlings, I do this as an assembly line in order to be efficient.
Here's the simple process:
Next, you want to just start planting:
When everything is transplanted and placed back on the windowsill (or shelf, depending on where you are setting these), water them well. What does 'well' mean? You can water them so water comes out the bottom.
Then don't water them for a week-- or at least as long as it takes for the dirt to look quite dry. I've said this countless times, but I am happy to say it again: This wakes up your seedlings' roots.
Okay, so here are my tomatoes, all transplanted and arranged on May 15 (about 10 days ago):
And here they are today:

Not bad, eh?
Anyway, here is probably a good place to announce a revision to this blog's approach. Instead of trying what seems to be impossible at this point: a post every day, I will post stuff here on at least Tuesday and Friday.
See you Friday! I will share with you some of the things I've put in the ground and how I have protected our planting patches from our chickens.
Sunday, April 25, 2010
Moving right along
Today let's just take a little look at the tomato and other plant starts. I'll write a little about maintenance of these starts and what we can expect from them in the next couple of days.
But for starters, here's what needs to be happening, provident garden-wise, in order to maximize your garden's yield.
Garden soil really ought to be turned over about now.


Alright, so maintenance of starts is easy. I water them every two-to-three days. The idea is to keep the dirt moist while they germinate, but then let the dirt dry out some after they've sprouted. This helps to establish roots.
As I've mentioned before, this is a great window for starts. Did you see how some of them were sort of bending in a certain direction? You will notice that they start bending toward the sunlight so that their leaves maximize their exposure. I don't want curvy plants, so I turn them every few days.
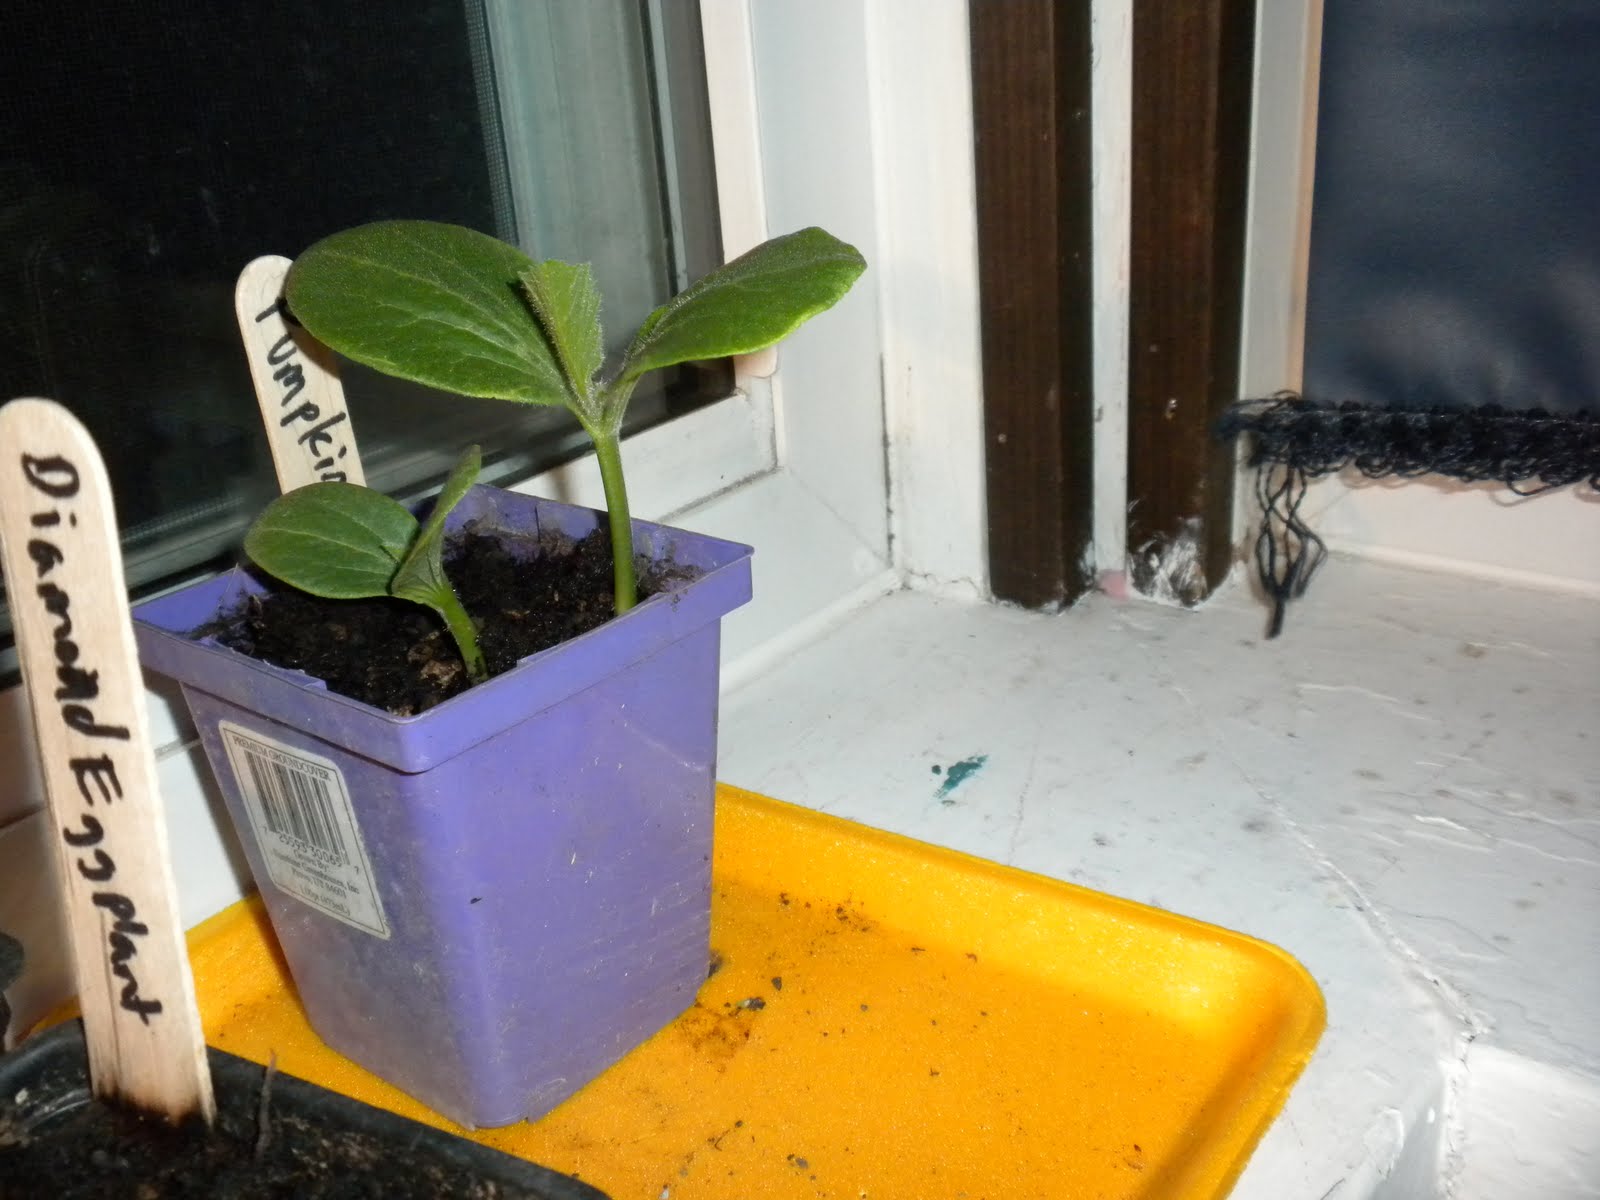
Those pumpkins are getting big already. I will be transplanting them by next Saturday so that there is one plant per 4-inch pot.
FYI, only one type of my eggplant has sprouted so far. This is fine; eggplant sometimes takes a while.
I realized that I didn't mention anything about how many seeds to plant when you are doing starts. This is up to you: how many plants you want and how much of a cushion you want to allow for dud seeds or dying plants. I plant two or three per cup to make sure I get everything I want and I usually keep everything that grows. This gives me extras. I sell them later in the season, when they are ready to go in the ground.
So that's it for today. May your garden be provident. Tomorrow I will write about my lawn and I'll post pictures. It's looking great.
Remember to share!
But for starters, here's what needs to be happening, provident garden-wise, in order to maximize your garden's yield.
Garden soil really ought to be turned over about now.
- If you are starting from scratch, you will either be turning over lapsed garden soil or grass.
- Lapsed garden soil
- If where you live has an existing garden patch that has not been used recently, I call this lapsed. You could call it dormant, like a volcano, but that sounds rather magma-like, so I'll stick with 'lapsed,' thanks!
- Best thing to do with lapsed soil is to spread a thin blanket of mulch, manure, grass, leaves or any other nice organic materials over your garden. You could spread any combination of the above as well.
- Next, either hand-till (with a spade (okay, a shovel)) the patch or use a good tiller. Roto-tillers can be rented easily. In my area, I call Ace Rents.
- Spread the soil evenly. Don't get too OCD about this.
- Water the soil every three to five days. This will get worms in your soil-- and they are magicians. You want them.
- Grass
- If you will be working in a space that has grass or other plant-life, you want to remove it first, of course.
- To remove grass, first use your shovel (spade!) to outline the patch. Just dig straight down about six inches all around the patch's edge.
- Next, use a spade/shovel to get down about two or three inches under the grass. Slide the shovel under there, cutting sheets of sod off. If you are careful, you can get good at this and end up with some nice pieces of sod. Use them to patch your yard in places!
- http://www.helium.com/items/637668-sod-removal-and-moving-made-easy
- Once the sod is gone, add a layer of mulch, manure or whatever, then till it in as explained above.
- Other
- You could also do some lasagna gardening!
- Choose your sunny space.
- Lay down a layer of cardboard to fill the space.
- Add a layer of leaves, grass or other organic material. Sticks and other tough materials won't really do it.
- Add a layer of newspaper.
- Add a layer of dirt.
- Add another layer of organic material.
- Add a layer of mulch.
- Plant right in there. No roto- or hand-tilling required.
- With your garden soil turned over, be sure to water every few days. Keep any neighborhood cats out-- you don't want cat crap in there.
- If you are thinking you want a border around your garden, now is the time to get one in. I have no recommendations on this, as everything I've tried has been cheap and has not worked. I will probably go with arsenic-free railroad ties the next time I try.
- Make sure you have all the seeds you need.
- It would be good to have an idea of how you will use your space. Be like me and draw up a complicated schematic! Or don't.
Okay, so that's what we want to be doing right now.
Here are my starts so far!

Here are some of the tomato plants. They are nearly 1 inch tall and have two leaves so far. This is significant. I'll talk about that more in a later post.


They are looking good, no?
Here are pumpkins:
Alright, so maintenance of starts is easy. I water them every two-to-three days. The idea is to keep the dirt moist while they germinate, but then let the dirt dry out some after they've sprouted. This helps to establish roots.
As I've mentioned before, this is a great window for starts. Did you see how some of them were sort of bending in a certain direction? You will notice that they start bending toward the sunlight so that their leaves maximize their exposure. I don't want curvy plants, so I turn them every few days.
Those pumpkins are getting big already. I will be transplanting them by next Saturday so that there is one plant per 4-inch pot.
FYI, only one type of my eggplant has sprouted so far. This is fine; eggplant sometimes takes a while.
I realized that I didn't mention anything about how many seeds to plant when you are doing starts. This is up to you: how many plants you want and how much of a cushion you want to allow for dud seeds or dying plants. I plant two or three per cup to make sure I get everything I want and I usually keep everything that grows. This gives me extras. I sell them later in the season, when they are ready to go in the ground.
So that's it for today. May your garden be provident. Tomorrow I will write about my lawn and I'll post pictures. It's looking great.
Remember to share!
Monday, April 19, 2010
Monday, April 19th--Tomatoes etc
I didn't post Sunday because I am lame. It's also because I'm still trying to figure out what I feel would be an appropriate post for the Sabbath.
Yes, I'm a very Christian dude. LDS, in fact.
But on to today's post! I thought it would be good to write about getting tomatoes and other things started inside, since now is the time to be doing that. I ought to point out that I live in the Wasatch Mountains of Utah. Thus, what I do is what works (or what I hope works) here.
By the way, on Pandora right now: Cover Me by Springsteen.
Okay. So, if you want to do your own tomato starts, now is the time to have them in their little planter pods. We actually got ours in late-- about nine days ago. We will still make it, and I'll talk about why in a minute, but here's where we do our starts:

This is, as you can see, a large window sill/shelf. It is in a room on the south end of our house, and it conveniently faces east. So when the sun peeks over the mountains we live under, it immediately starts shining on this spot. On good days, we probably get about six hours of blindingly bright sun there.
Notice the philodendron. See how the leaves go up to the left? Yeah, so that vine stretches about twenty feet from there, lining the top of the treatment lining the top of these windows and their colleagues on the south side of the room. Then there is a jar of spider plant babies getting roots. Then there is a potted spider plant. It is one of seven in the house.
Now playing on Pandora: In the Name of Love by U2
Now here's a closer shot of the starts:

The thing to remember is that you need to find a spot with plenty of sun and that is out of reach of kiddies. If you have a cat, you need to train that cat to stay away. Our cat, Tally, is still being trained. My lovely wife rescued the Black Cherry starts today.
Grrr.
Now playing on Pandora: Busted Stuff by Dave Matthews Band
The other thing you want to do is start gathering these little planters. I would guess there's a technical or trade term for them, but I don't know it. You see those yellow styrofoam-y things under them? Those are to catch water-- which you will need. We saved and sterilized the styrofoam trays that our sausages and meats came in for a while. They are small, lightweight, and you probably see that the planters fit perfectly. Add to that the fact that they store easily and they're pretty much awesome.
Alright, so now let's see where we are with our starts:

These are the Black Cherry plants. You can see that, though, can't you? That's because those popsicle sticks are absolutely perfect for keeping track of the seeds you plant. Son #2 is a devoted crafter, and he had a box that started with 300 of these. He had a few to spare and I used black sharpie on them. Very utilitarian and easy to use.
Can you make out the small plants there? They are just over 1/2 inch tall so far. Pale green stems and two long, narrow leaves coming out the top.
Here are some more:
 These are called 'Marianna's Peace.' We have never planted these before; they were a gift from a local friend named Shirley. She's a tomato master and always tries a few new tomatoes each year.
Now playing on Pandora: Domino by Van Morrison.
Some more:

Nice big sprout in the Pink Ponderosa, another which we have not tried before.
Earlier I mentioned that we planted these later than we really wanted to. I was swamped with school and Annemarie was swamped with nutzo cool kids and work. But we will make it and still get a solid crop. This is because we can get these in the ground in the first week of June and still be fine. I usually put them in the ground in the second or third week of May, but that probably won't happen this year.
But I am accelerating their growth, so you never know.
Now playing on Pandora: Hard Candy by Counting Crows.
How am I accelerating their growth? Now that we have sprouts, I am turning on this lamp every evening:

This should keep things actively growing for a little longer each day. We will see if it works.
Today's assistant, because she is extremely cute:

This is Lily on Sunday. She is wearing her Easter dress and loves to pick dandelions. Notice that my yard has none, but she does this kind service for our neighbors. I say they can pick dandelions and keep them outside, but they have to pick them before they go to seed.
Anyway, that's it for today. I hope the info about starts helps. It's really not hard to start your own tomatoes. You just need a good, safe sunny spot; the little planter pots; a water catcher to go under the little pots; and then some bigger pots to transplant the starts to when they're bigger. We save our yogurt containers; I'll show you those another time.
Put seeds in dirt, water them, and make sure they have sun. Guess what? They'll grow.
Tomorrow I'll talk a little bit about heirloom seeds.
I hope your garden is provident this year. Feel free to share this site with friends!
Yes, I'm a very Christian dude. LDS, in fact.
But on to today's post! I thought it would be good to write about getting tomatoes and other things started inside, since now is the time to be doing that. I ought to point out that I live in the Wasatch Mountains of Utah. Thus, what I do is what works (or what I hope works) here.
By the way, on Pandora right now: Cover Me by Springsteen.
Okay. So, if you want to do your own tomato starts, now is the time to have them in their little planter pods. We actually got ours in late-- about nine days ago. We will still make it, and I'll talk about why in a minute, but here's where we do our starts:

This is, as you can see, a large window sill/shelf. It is in a room on the south end of our house, and it conveniently faces east. So when the sun peeks over the mountains we live under, it immediately starts shining on this spot. On good days, we probably get about six hours of blindingly bright sun there.
Notice the philodendron. See how the leaves go up to the left? Yeah, so that vine stretches about twenty feet from there, lining the top of the treatment lining the top of these windows and their colleagues on the south side of the room. Then there is a jar of spider plant babies getting roots. Then there is a potted spider plant. It is one of seven in the house.
Now playing on Pandora: In the Name of Love by U2
Now here's a closer shot of the starts:

The thing to remember is that you need to find a spot with plenty of sun and that is out of reach of kiddies. If you have a cat, you need to train that cat to stay away. Our cat, Tally, is still being trained. My lovely wife rescued the Black Cherry starts today.
Grrr.
Now playing on Pandora: Busted Stuff by Dave Matthews Band
The other thing you want to do is start gathering these little planters. I would guess there's a technical or trade term for them, but I don't know it. You see those yellow styrofoam-y things under them? Those are to catch water-- which you will need. We saved and sterilized the styrofoam trays that our sausages and meats came in for a while. They are small, lightweight, and you probably see that the planters fit perfectly. Add to that the fact that they store easily and they're pretty much awesome.
Alright, so now let's see where we are with our starts:

These are the Black Cherry plants. You can see that, though, can't you? That's because those popsicle sticks are absolutely perfect for keeping track of the seeds you plant. Son #2 is a devoted crafter, and he had a box that started with 300 of these. He had a few to spare and I used black sharpie on them. Very utilitarian and easy to use.
Can you make out the small plants there? They are just over 1/2 inch tall so far. Pale green stems and two long, narrow leaves coming out the top.
Here are some more:

Now playing on Pandora: Domino by Van Morrison.
Some more:

Nice big sprout in the Pink Ponderosa, another which we have not tried before.
Earlier I mentioned that we planted these later than we really wanted to. I was swamped with school and Annemarie was swamped with nutzo cool kids and work. But we will make it and still get a solid crop. This is because we can get these in the ground in the first week of June and still be fine. I usually put them in the ground in the second or third week of May, but that probably won't happen this year.
But I am accelerating their growth, so you never know.
Now playing on Pandora: Hard Candy by Counting Crows.
How am I accelerating their growth? Now that we have sprouts, I am turning on this lamp every evening:

This should keep things actively growing for a little longer each day. We will see if it works.
Today's assistant, because she is extremely cute:

This is Lily on Sunday. She is wearing her Easter dress and loves to pick dandelions. Notice that my yard has none, but she does this kind service for our neighbors. I say they can pick dandelions and keep them outside, but they have to pick them before they go to seed.
Anyway, that's it for today. I hope the info about starts helps. It's really not hard to start your own tomatoes. You just need a good, safe sunny spot; the little planter pots; a water catcher to go under the little pots; and then some bigger pots to transplant the starts to when they're bigger. We save our yogurt containers; I'll show you those another time.
Put seeds in dirt, water them, and make sure they have sun. Guess what? They'll grow.
Tomorrow I'll talk a little bit about heirloom seeds.
I hope your garden is provident this year. Feel free to share this site with friends!
Subscribe to:
Posts (Atom)