Showing posts with label plants. Show all posts

Thursday, May 6, 2010

Since I didn't post yesterday,

I will put up two posts today. 


But first, let me explain. No, it would take too long. Let me sum up. 


(If you get the reference, you get a pat on the back!)


So I have been blasting away at my MA project write up. If you don't know what MA means, it is my Master of Arts degree. I have completed all of my course work, and now I must finish the write up and defend and all of that. Last night I finished the first major draft of the write-up. It's about sixty pages long. Because I had to get it done last night, I opted to stay focused on it until it was done. Then it was really late and bed called. 


Two posts today. One now and one later! (Is anybody else suddenly thinking about chewy candy?)


The first one is what I will call the icing on the cake of soil cultivation. Did you know that one of the best ways to fight weeds in your garden is by cultivating healthy soil? Here's what I've learned. 


You see, I am an avid gardener. I love to have my fingers in the soil and I particularly love to have my kids join me in the garden. But I am by no means a pro. My neighbor from two doors down, on the other hand, is very much a pro. The other day I was complaining to her about the weeds that spring up from all the elm tree seed pods that fly around during the spring. So she said she never really has a problem with weeds. Stupefied, I listened as she described how she controlled weeds.


Shirley is her name. She told me that keeping the soil healthy and cultivating and nourishing it is the surest way to control weeds. Here is what she does.
Every Autumn, when the season is over, she has her husband till the garden up, with all of the dying veggie plants and some steer manure mixed in. He tills the garden well, breaking up the clumps and loosening it well.

Then, come Spring, Shirley has her husband till the garden again. This turns any nascent weeds upside down and kills their root system stone cold dead. After that, Shirley and her husband, Ted, top the garden soil with the bottom of their compost heap.
All of this activity keeps the soil's natural nutrient balance perfect, and also gets rid of the weeds that sometimes sprout from flying seeds. Furthermore, the soil promotes spectacular flowers and veggies. When these veggies and flowers grow strong and healthy, they basically do not allow weeds to come around and take up space.

As a final note, we are also glad we have chickens. When those elm seeds go flying and end up on our ground and garden plots, we let the chickens loose. Those happy hens gobble the elm seeds up-- nipping the problem right in the bud!

I'll see you later today. Remember: you can follow this blog and use Google Reader to keep up to date with the feed. You can also just use whatever RSS feed you already use. But don't keep it to yourself! Share!

Sunday, April 25, 2010

Moving right along

Today let's just take a little look at the tomato and other plant starts. I'll write a little about maintenance of these starts and what we can expect from them in the next couple of days.

But for starters, here's what needs to be happening, provident garden-wise, in order to maximize your garden's yield.

Garden soil really ought to be turned over about now.

    • If you are starting from scratch, you will either be turning over lapsed garden soil or grass. 
      • Lapsed garden soil
        • If where you live has an existing garden patch that has not been used recently, I call this lapsed. You could call it dormant, like a volcano, but that sounds rather magma-like, so I'll stick with 'lapsed,' thanks!
        • Best thing to do with lapsed soil is to spread a thin blanket of mulch, manure, grass, leaves or any other nice organic materials over your garden. You could spread any combination of the above as well.
        • Next, either hand-till (with a spade (okay, a shovel)) the patch or use a good tiller. Roto-tillers can be rented easily. In my area, I call Ace Rents. 
        • Spread the soil evenly. Don't get too OCD about this. 
        • Water the soil every three to five days. This will get worms in your soil-- and they are magicians. You want them. 
      • Grass
        • If you will be working in a space that has grass or other plant-life, you want to remove it first, of course. 
        • To remove grass, first use your shovel (spade!) to outline the patch. Just dig straight down about six inches all around the patch's edge.
        • Next, use a spade/shovel to get down about two or three inches under the grass. Slide the shovel under there, cutting sheets of sod off. If you are careful, you can get good at this and end up with some nice pieces of sod. Use them to patch your yard in places! 
        • http://www.helium.com/items/637668-sod-removal-and-moving-made-easy
        • Once the sod is gone, add a layer of mulch, manure or whatever, then till it in as explained above. 
      • Other
        • You could also do some lasagna gardening!
        • Choose your sunny space.
        • Lay down a layer of cardboard to fill the space.
        • Add a layer of leaves, grass or other organic material. Sticks and other tough materials won't really do it. 
        • Add a layer of newspaper. 
        • Add a layer of dirt. 
        • Add another layer of organic material. 
        • Add a layer of mulch. 
        • Plant right in there. No roto- or hand-tilling required. 
    • With your garden soil turned over, be sure to water every few days. Keep any neighborhood cats out-- you don't want cat crap in there. 
    • If you are thinking you want a border around your garden, now is the time to get one in. I have no recommendations on this, as everything I've tried has been cheap and has not worked. I will probably go with arsenic-free railroad ties the next time I try. 
    • Make sure you have all the seeds you need. 
    • It would be good to have an idea of how you will use your space. Be like me and draw up a complicated schematic! Or don't.
Okay, so that's what we want to be doing right now. 

Here are my starts so far!


Here are some of the tomato plants. They are nearly 1 inch tall and have two leaves so far. This is significant. I'll talk about that more in a later post. 


They are looking good, no? 

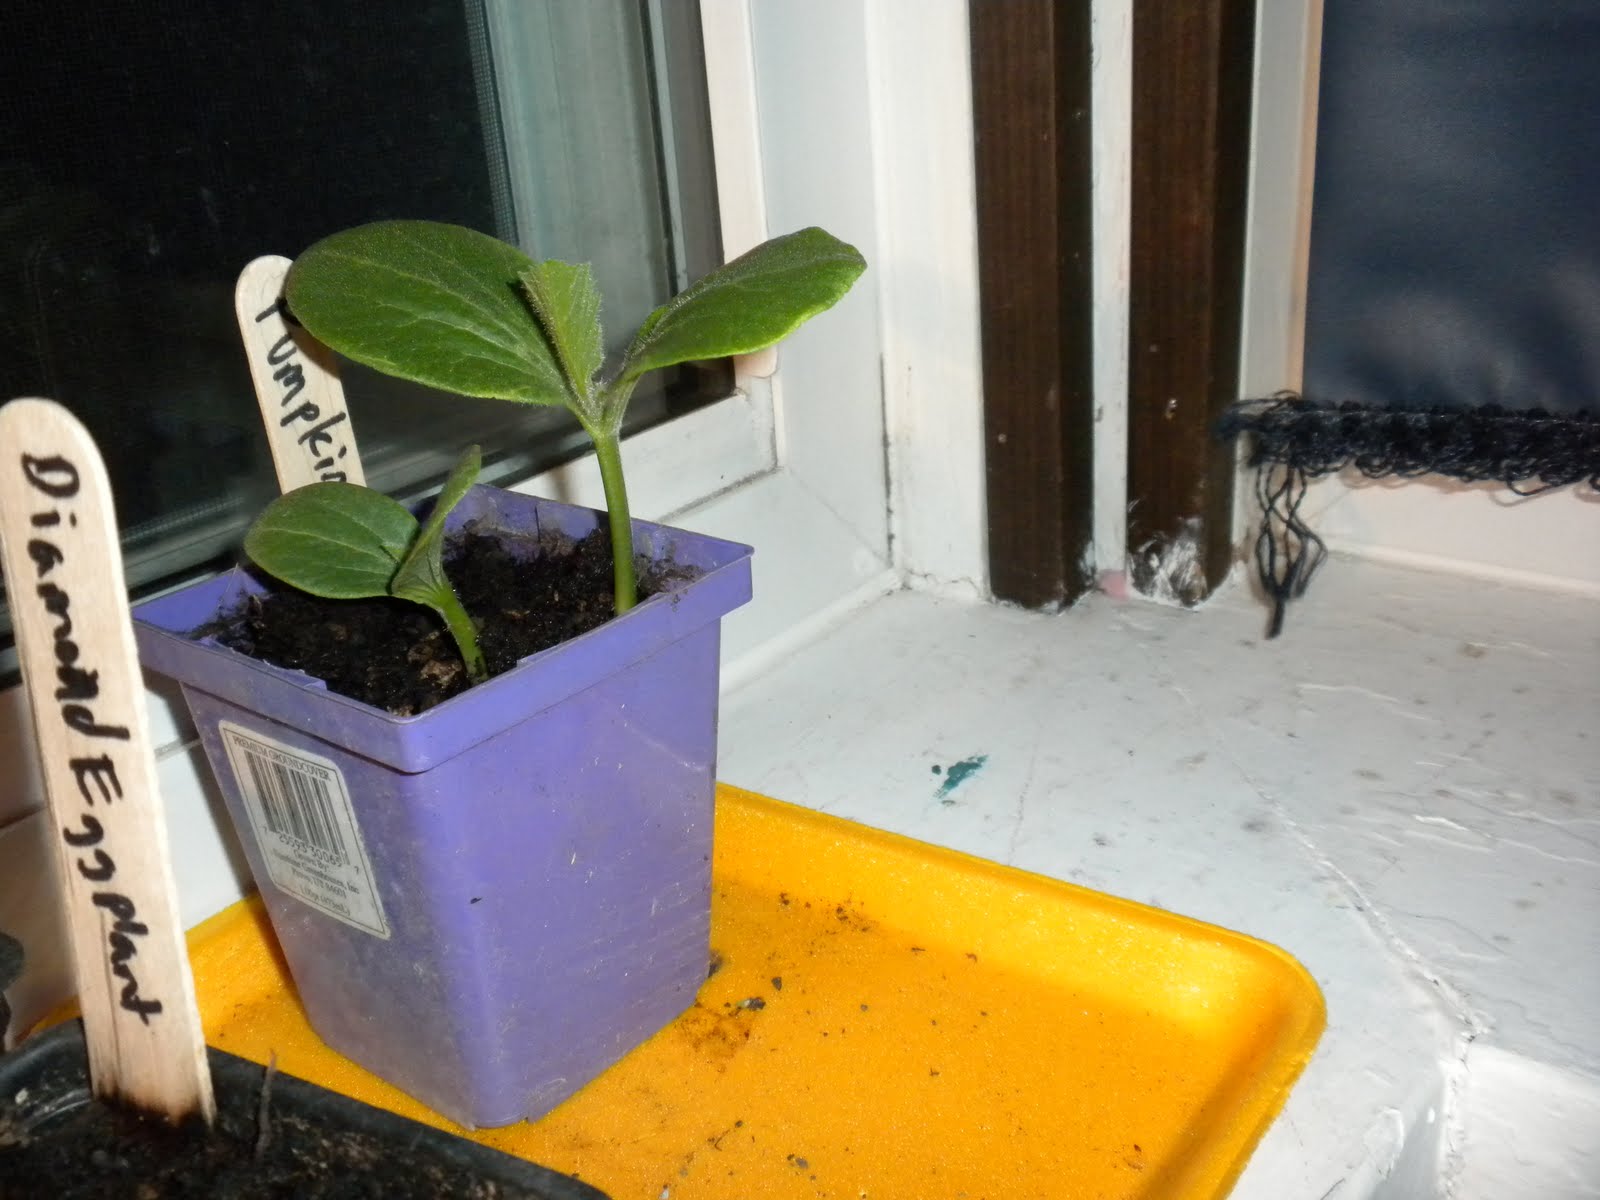
Here are pumpkins: 


Alright, so maintenance of starts is easy. I water them every two-to-three days. The idea is to keep the dirt moist while they germinate, but then let the dirt dry out some after they've sprouted. This helps to establish roots.

As I've mentioned before, this is a great window for starts. Did you see how some of them were sort of bending in a certain direction? You will notice that they start bending toward the sunlight so that their leaves maximize their exposure. I don't want curvy plants, so I turn them every few days.

Those pumpkins are getting big already. I will be transplanting them by next Saturday so that there is one plant per 4-inch pot.

FYI, only one type of my eggplant has sprouted so far. This is fine; eggplant sometimes takes a while.

I realized that I didn't mention anything about how many seeds to plant when you are doing starts. This is up to you: how many plants you want and how much of a cushion you want to allow for dud seeds or dying plants. I plant two or three per cup to make sure I get everything I want and I usually keep everything that grows. This gives me extras. I sell them later in the season, when they are ready to go in the ground.

So that's it for today. May your garden be provident. Tomorrow I will write about my lawn and I'll post pictures. It's looking great.

Remember to share!