Raising chickens is all around a good thing. Today we got seven eggs, so it can be a tasty thing too! But were those eggs cheap?
That's the question I want to answer here today.
Getting started with chickens is where the majority of the cost you will expend will happen. Your chickens will need a place that they can stay during the night where foxes, raccoons and rats cannot get to them. This is the same whether you are in suburbs, the country or even in the city.
Your chickens will also need a place that they can lay their eggs, equipment for food and water, and if you have a coop you will want to have something to cover its floor. The also need a sheltered place that they can roost when they go to sleep. You will also need a place to store their food and whatever you will use to cover the floor of the coop and the laying boxes.
So I'm going to show you what we've done. Our city has an ordinance that allows for a few chickens, so we've gone ahead and gotten some. We raised four of the seven from chicks-- the other three were given to us by some friends who had too many.
I won't go into raising chicks today, but I will discuss and show what we've done to maintain the chickens.
We decided that the chickens needed a coop where they could be safe from nightly predators. I spent a lot of time looking for ideas and materials for this coop. We at first thought we might build them a nice house for them to chill in during the evening-- they could wander the back yard during the day. However, building materials and such were pretty expensive- so I decided to do a coop.
I first looked into getting a dog run that I could stretch chicken wire over as a roof. You need a roof because predators like raccoons and rats can climb. Heck, having a floor is a good thing too. We thought a run of about 4-5 feet wide and 8-10 feet long would do well. You can buy these prefabricated at DIY stores like Home Depot and Lowe's.
They were over $200. Add to that the cost of chicken wire and such and it's getting pricey!
But we needed something like a dog run, because we needed to be able to get in and out of the coop easily to get eggs, change water, provide food and do other work.
So I thought about building a coop with 2x4's and chicken wire.
2x4's were a little pricey too.
Then I had this idea that I could build a frame out of pvc, then use zip ties to fasten chicken wire to the frame on all sides, the bottom AND the top. I drew a blueprint, gathered measurements and checked prices. The zip ties were a friend's idea, actually. I could frame a doorway pretty easily and build a door with the pvc too.
The total would be just over $100. This was the best option.
So I built the coop:


Notice it has a door. Most mornings, we head out and wedge the coop door open and build a quick barrier of compressed board between the open door and the house wall. This allows the chickens to come and go between our back yard and their coop as much as they want.
They don't wander much beyond the back yard. Sometimes they will hop a fence, but it's rare.
Anyway, take a look at that coop! It's about 8 feet long and four feet wide. The door is just over 2 feet wide. The coop has chicken wire all over and we bungee the door closed when locking the chickens up for the night.
Notice two white, upside-down buckets with red bottoms. One is their feeder and the other is their water. They usually find bugs and scraps in the back yard, compost and garden plots for the majority of their food, but we like to make sure they have enough to eat. A well-fed chicken is usually a good layer.
See- they wander:

Inside the coop, the chickens have a roosting shed:

The shed is 1/4 inch ply wood, 2x4s, some corrugated roofing and some 1 inch closet rods for roosts. I spent less than $50 and was able to build this shed and the storage shelter I'll show you in a minute. Here's a heads-up, I built the top, sides and back as separate pieces, then assembled the roosting shed inside the coop.
The chickens roosted in this through the entire winter and had no problems whatsoever. Winters here are plenty cold. We used an electric dog water bowl to make sure they had plenty of un-frozen water through the season.
Inside the coop, they also have laying boxes:

This is an old kitchen cupboard. You're looking at what used to be the back. We nailed the doors closed, made the openings in the back much smaller, and fastened rag strips to the openings too. Chickens like a nice private place to lay eggs.
Using this cupboard- which was taking space in our storage basement- was my wife's idea. It was brilliant.
And here's the storage shelter:

The tarp is there because the storage shelter is essentially the same design as the roosting shed- it has an open front. Here's the easy way we get in and out of the storage shed- we hook an the tarp on a nail:

And here's the inside:
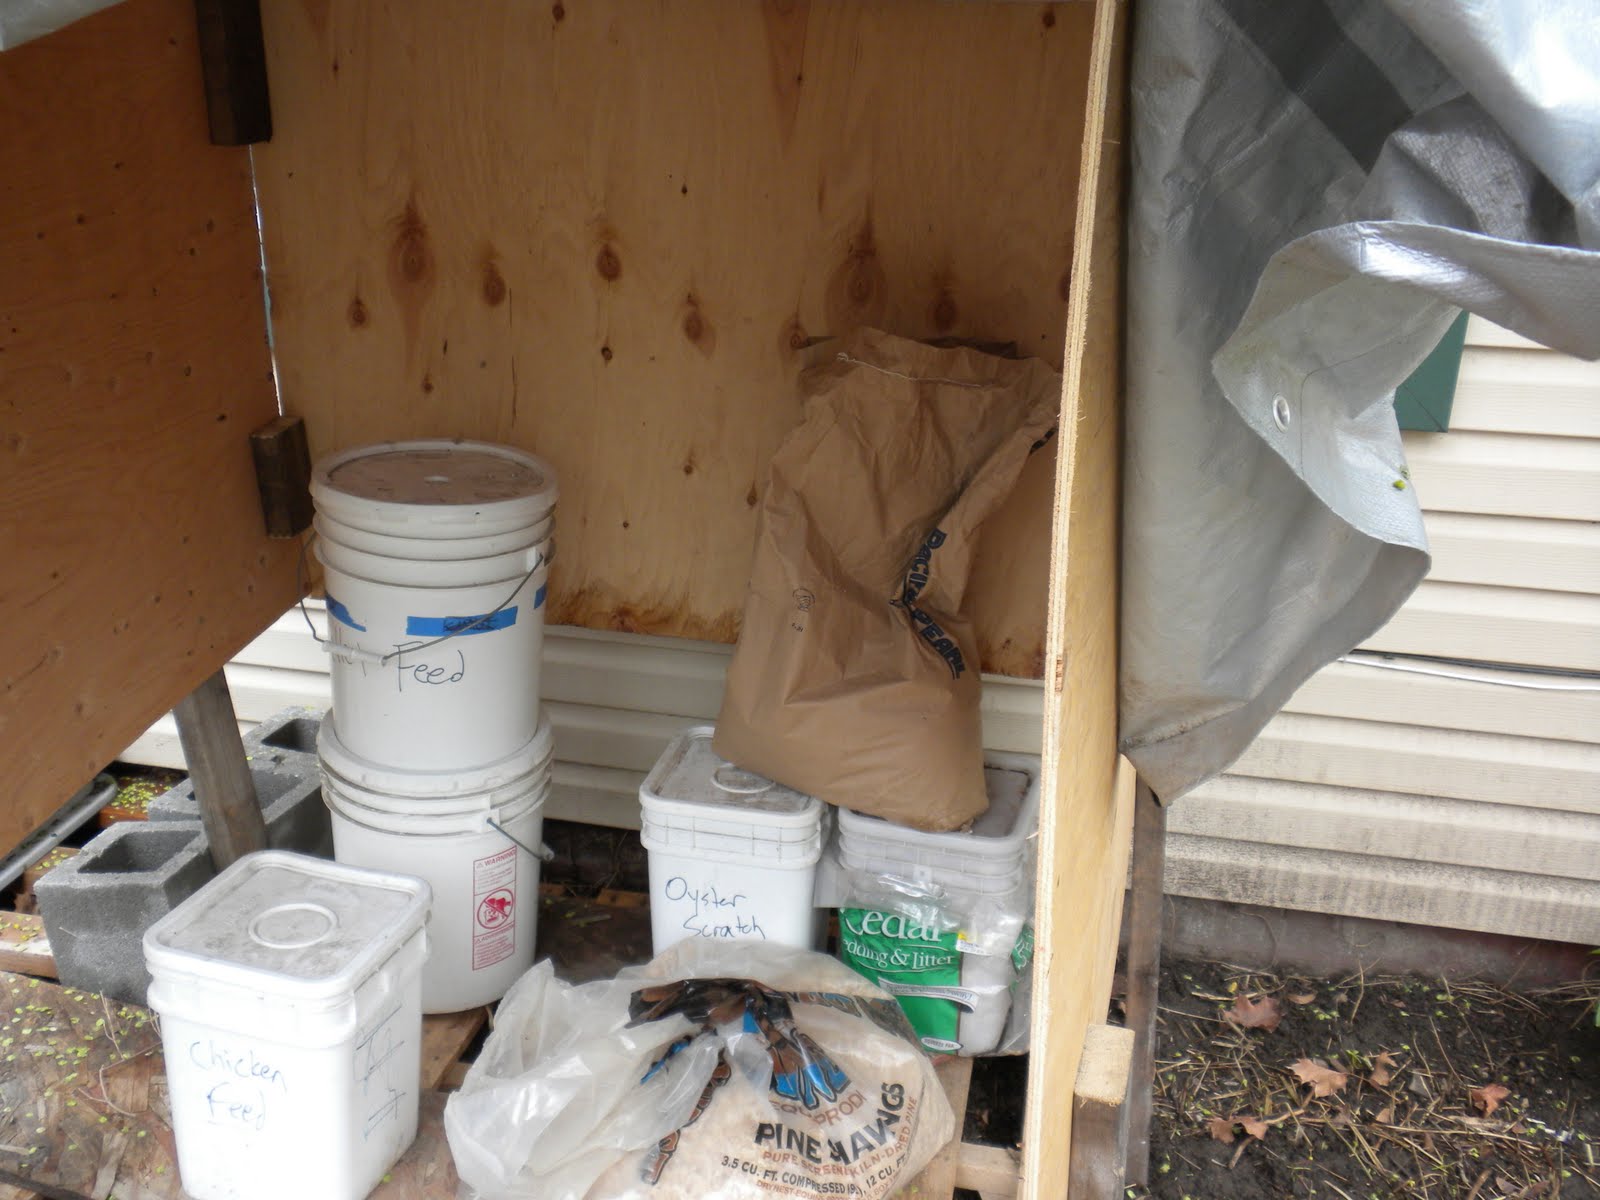
You just don't want your food or material for the coop's floor to get wet. In a few weeks, we will go find a good straw bale and it will get stored in here too.
So that's pretty much the set-up.
Materials for all of this ran about $180 or so. Food is not expensive, although you want to figure in gas cost. The chickens only start laying at about 5 months old, if I remember right.
The point here is that the eggs are not actually cheap. They are delicious. The experience with the chickens is beyond value for us as a family. You never get in a bind and have to go borrow eggs from a neighbor.
And you know what? The chickens are keeping the back yard completely pest free. No earwigs. No pill bugs. No ants even.
We'll talk about chicken care and maintenance in the coming days.

No comments:
Post a Comment
Feel free to comment! Please be polite.